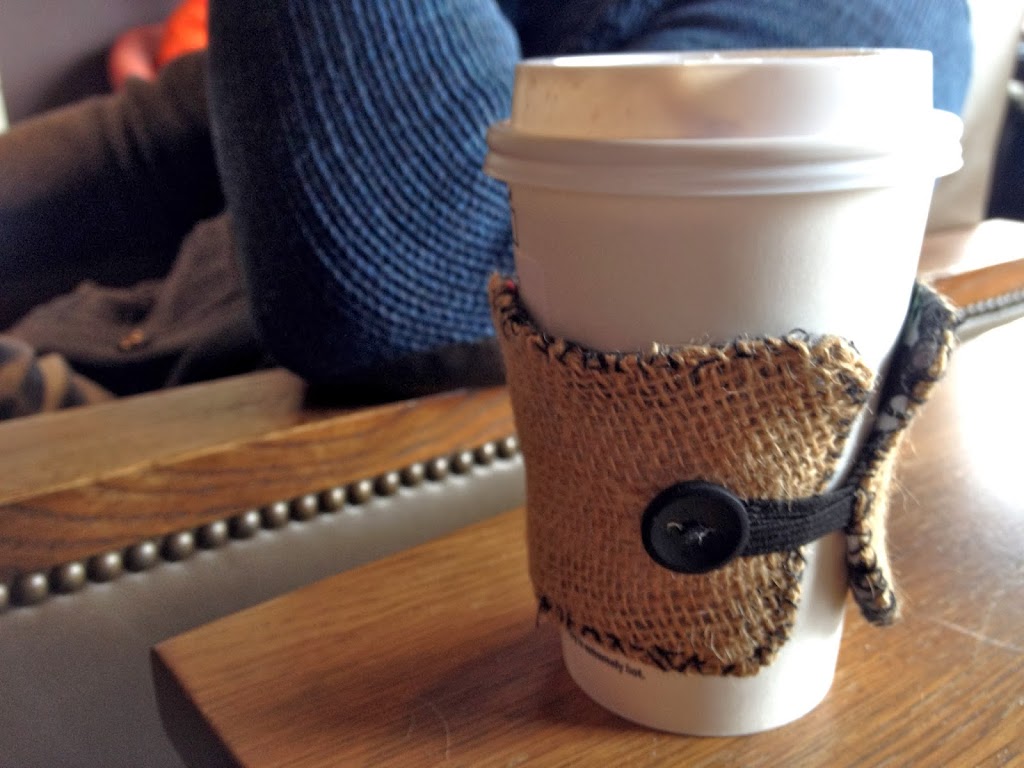
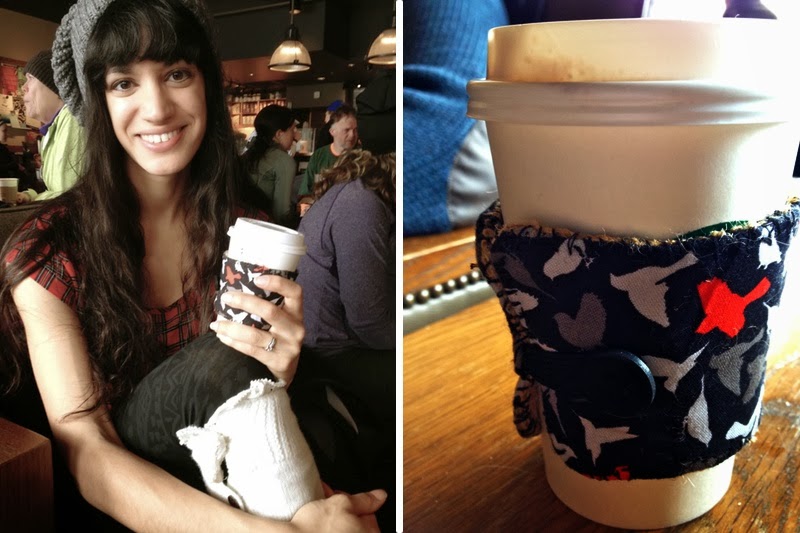
There’s a little something I’ve been working on the last couple of days… a coffee cup sleeve.
Why, you ask? Well the answer is twofold.
Number 1: Simply put, I don’t have a job and meanwhile currently spend my days in a basement, so until life takes on the luxury of moving forward, I am left to attempt creativity in ways that I haven’t yet otherwise had the opportunity to delve into.
Number 2: Lucrezio will soon be diving into the studio to create a new album. (Yay!!) Although in order to see the project thru to completion, it looks like we will need to go the way of most musicians these days and gain financial support via crowd funding. The incredibly fun part about this is being able to give gifts to all who contribute! So indeed I am experimenting with how we might be able to make our gifts a bit more personal, as well as those that match our DIY approach towards music.
Oh, I just thought of a third reason! Apparently March is National Craft Month. So there you have it.
That all being said, I have a bit more fine tuning to do, but wanted to share with you the very beginnings of a crafty endeavor! Besides, there are dozens and dozens of tutorials out there, or so it seems, for coffee cup sleeves and just about anything else you’d like to attempt to make yourself. Naturally, we tend to see a perfectly executed finished product, but I think we all know that first tries are barely that. Seems to be that in seeing the “first tries” the reality of mistakes gives us confidence in our imperfections. Relish in your mistakes only because they are beneficial in helping you grow! Without them we would not know where the change is needed.
Hmm, okay, so before I run with that mindset … although perhaps the parallel to the shaping of our character is already clear … I might as well show you how I made my first coffee cup sleeve and what I learned along the way.
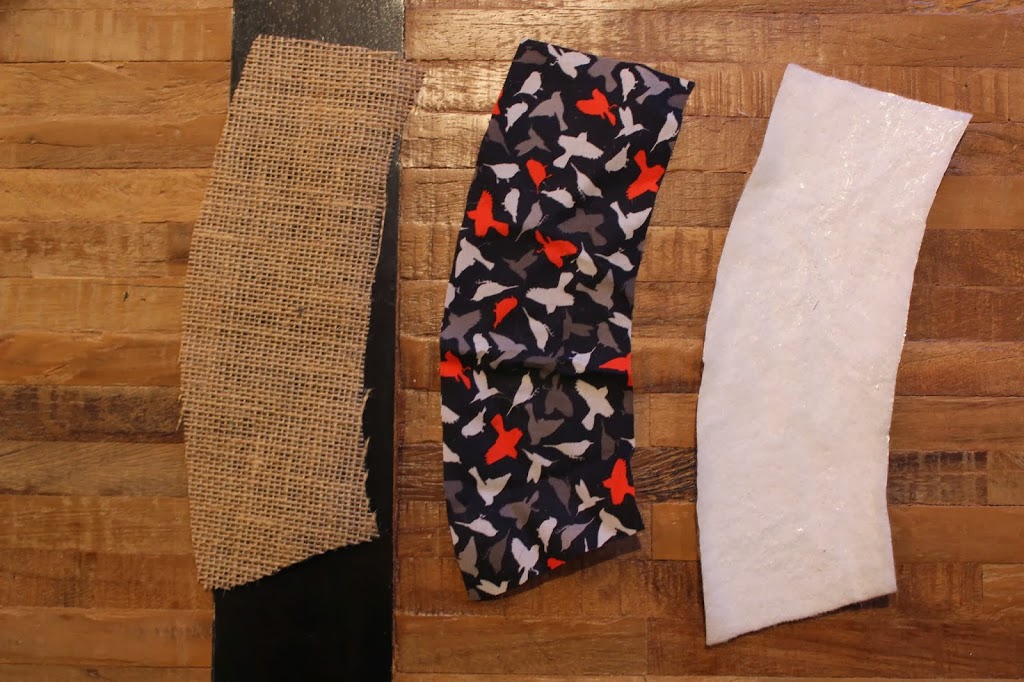
Materials:
Needle & Thread
1/4 yard (or less) Burlap
1/4 yard (or less) Cotton Fabric
1/4 yard (or less) of InsulBrite
3.5″ elastic
Scissors & Pins
2 two-hole buttons that measure 1.5-2″
Coffee Sleeve (for your template)

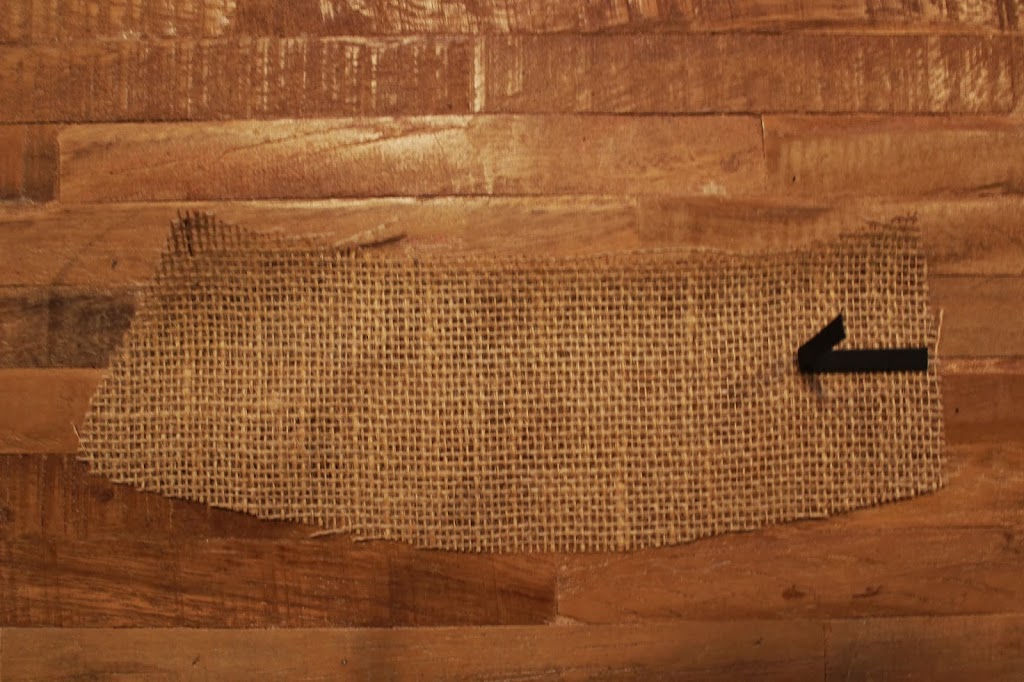
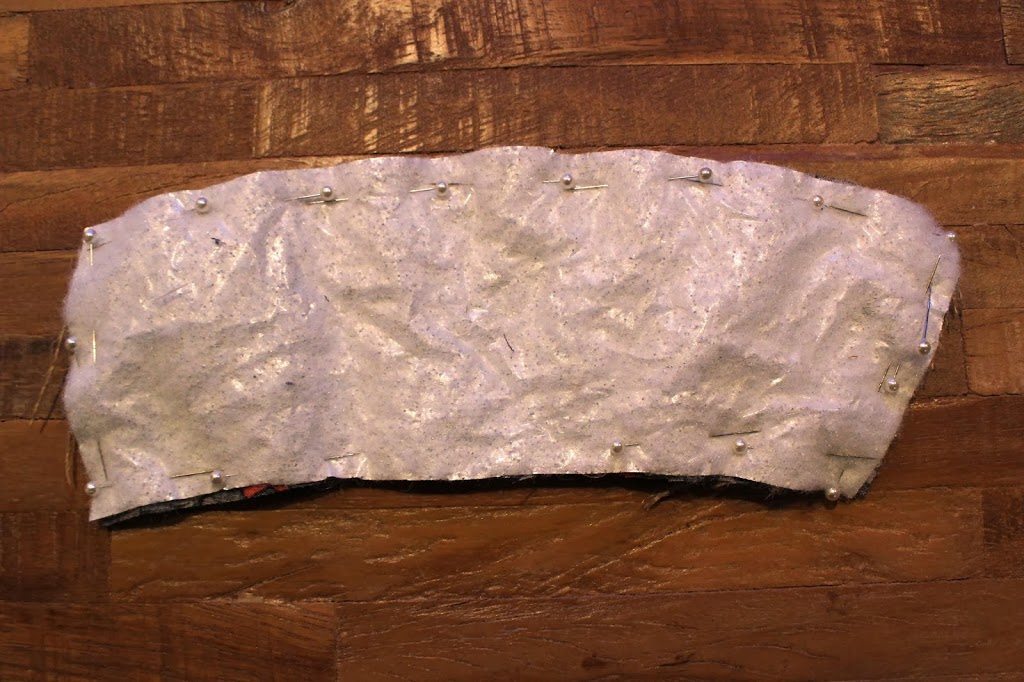
The white piece of paper you see pictured is a template I grabbed from a crafty blogger, but I found it to be a touch small. So the best way to go is to take your cardboard coffee sleeve (from a local coffee shop) and cut your fabric 1/4″ wider than the sleeve itself all the way around. Be sure to first snip off the tab that overlaps, or in other words, where there was glue.
Take your piece of elastic and face with loop inward, lying on your burlap so that it will properly be facing out of the sleeve when the fabric is turned right-side out. You can always forego the burlap, as it does require a bit more patience, and simply use two pieces of cotton.
Add your fabric with the wrong-side turned out. If you are going with two pieces of cotton instead of the burlap, make sure that the right-sides of each piece of fabric are facing each other. (Keep that in mind when cutting the fabric from your template!)

Lastly, add your Insulbrite and pin all three pieces, including your elastic, together. Be sure to leave about a 3 inch opening so that you will have a place to turn your sleeve right-side out. As you can see, I left my open on the long bottom side, although I would suggest leaving the opening on the elastic-free short side. Would be a little easier to turn right-side out and if you’re a sewing beginner like myself, your stitch will look a bit more consistent all the way around.
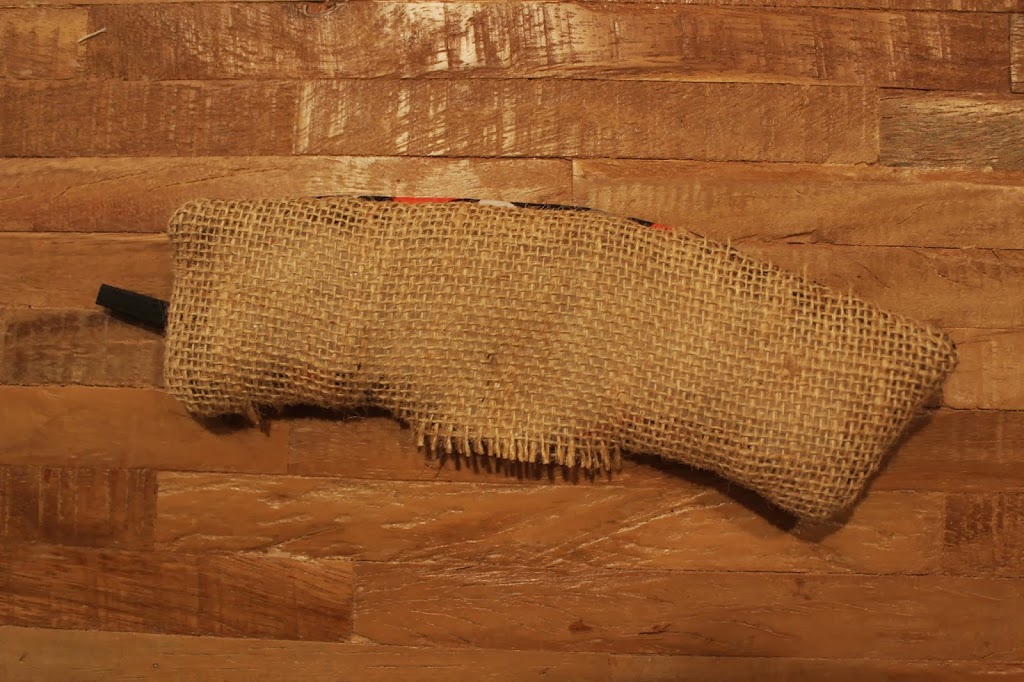
Sew your pieces together, allowing for a 1/4″ seam. In reflection, I think a back stitch would have been the way to go when sewing by hand. (May have helped me keep a straighter line!) I understand that it’s also a very durable stitch, and that would come in handy when dealing with burlap. Although be especially sure to back stitch over the elastic as you don’t want that popping out.
Time to turn your sleeve right-side out! Looking lovely isn’t it?
More sewing. Stitch all the way around near the edge, as well as going back around your sleeve with a cross stitch, particularly taking heed of where the burlap has frayed… because I can assure you that it will! In the case that you’re a bit out of sewing practice, like myself, I found a great YouTube Video going over a handful of different stitches, and both the back stitch and cross stitch are in there. (I just wish I found this beforehand!)
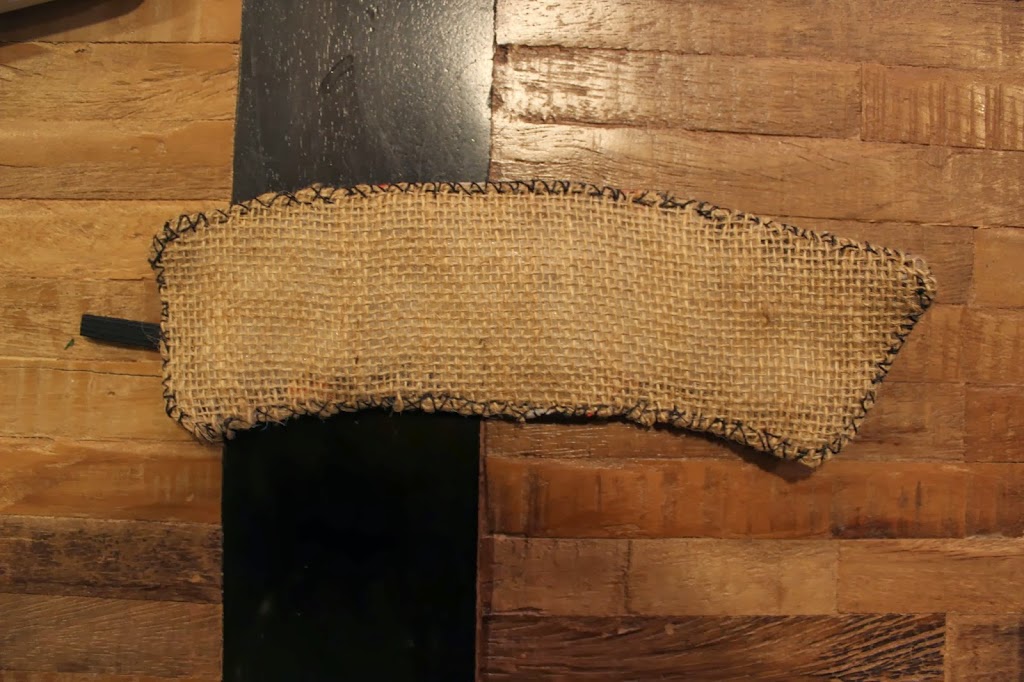
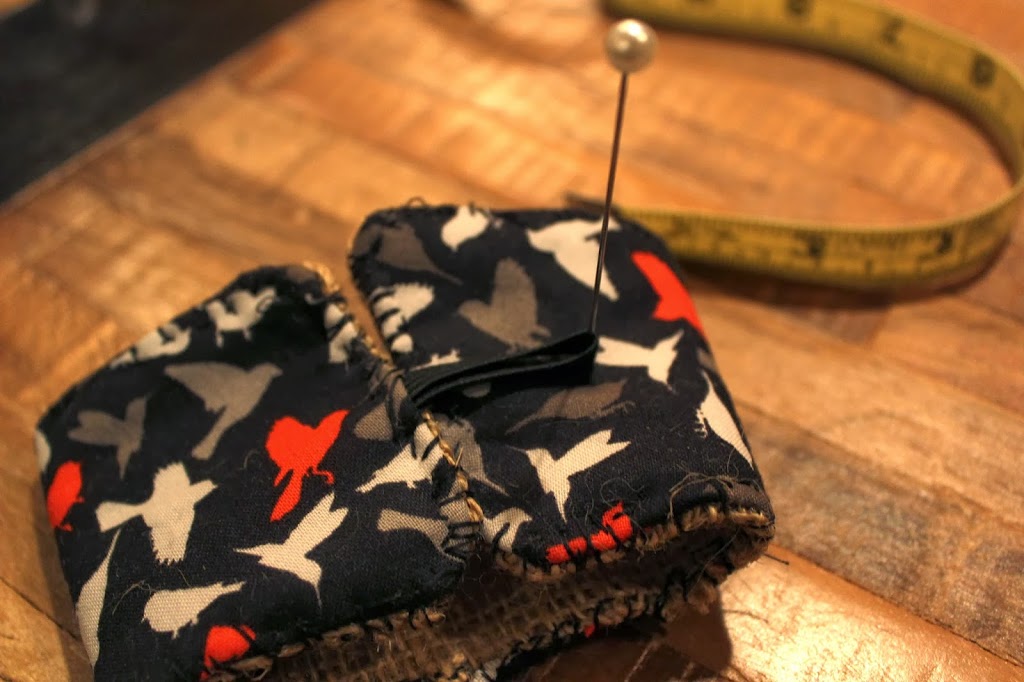
Now to sew on your buttons. I placed mine about an inch and a half in on either side. (Did I mention that this is a reversible coffee sleeve?!) Make sure you are not sewing too tightly as your elastic will need a bit of room to sit underneath the button. If needed, you can put a toothpick sideways underneath your button while sewing so as to keep from pulling it too tightly to the fabric.
Voila! You have a nifty coffee cup sleeve that not only works as an insulator for a yummy hot drink, but having your own is an eco-friendly way to enjoy coffee out without scrapping another cardboard sleeve. Of course to take the cake, this little creation is just plain fun. Just be sure to take the sleeve with you when you throw out your coffee cup! Naturally, Jordan and I had to test this thing out… I’m so glad we did, because it made for a delicious Saturday morning.